MENU

Showing posts with label recipe. Show all posts

Thursday, July 5, 2018

Almond & Coconut Choc Chip Cookies - Gluten Free Recipe

As I have a bit of a sweet tooth, I have been trying to find some more gluten free cake and biscuit recipes, so when I came across this one I knew I could adapt it and make it something special.

If you love coconut and almonds with a little chocolate chip hit then these are for you, they are kind of like a macaroon with a biscuit twist, everyone in the family loved them, including my normally coconut avoiding children.

gluten free almond and coconut cookies


Ingredients - Makes 12

140g Ground Almonds
30g Chocolate Chips (I used Milk Choc)
40g Dessicated Coconut
½ tsp Baking Powder
¼ tsp Salt
75g Soft Brown Sugar
1 Egg
3 Tbsp Coconut Oil
½ Tsp Vanilla Extract

Method:
  1. Preheat oven to 180c, line a baking tray with greaseproof paper.
  2. Mix the ground almonds, desiccated coconut, baking powder, chocolate chips, salt and sugar together in a large mixing bowl until evenly mixed.
  3. In another bowl, whisk the egg until smooth and it has doubled in size, then mix in the coconut oil and vanilla essence.
  4. Add the egg mixture to the dry mixture and mix well until everything is combined, then cover with cling film and pop into the fridge for 30 minutes.
  5. After 30 minutes, take out of the fridge, take a small amount, roughly a heaped teaspoon and roll into a ball in the palm of your hands, pop onto the baking tray and flatten slightly with the back of a fork.
  6. Bake in the oven for about 8-10 or until the edges are golden brown.
These are a great store cupboard cookie, I always have a bag or two of ground almonds now for my brownies or finding new recipes like this.

Wednesday, July 19, 2017

Eats from the Street Pop-up Foodie Festival Nottingham plus Easy Chicken & Chorizo Paella Recipe

We love finding new foods and flavours in The Mummy Diary household, in fact we can often be found celebrating different traditional holidays from around the world, with local delicacies, tastes and flavours.

One of our favourite, super quick dinners is my easy-to-make Chicken and Chorizo Paella. Straight up, this recipe started as just a bit of this and that cobbled together, but for you guys and to celebrate the arrival of Eats from the Street in Nottingham this weekend I have written it down for my readers.

What I love about cooking and finding recipes to suit your family is that they become your own and something you can be proud of, so don’t be afraid to stray and add something else if you like that flavour.


Ingredients:

Olive Oil
1 x Medium White Onion
2 x Garlic Cloves 
70g Chorizo
500g Chicken Breast 
1 x Cup of Basmati Rice
2 x Teaspoons Smoked Paprika
Few Stands of Saffron (optional)
2 x Tablespoons Tomato Puree
750ml Hot Chicken Stock
Salt & Pepper
1 x  Cup of Frozen Peas
1 x Lemon (optional)

Method:

1. Dice the onion, finely slice the garlic and roughly chop the chorizo and chicken into small cubes. 

2. Heat the oil in a deep sided frying pan and add the onion, fry on a low heat until see though, add the garlic and chorizo and cook until the chorizo has started to release its oils; add in the paprika and saffron (if using) and stir.

3. Add in the chicken and fry until golden and evenly cooked on all sides; once cooked add in the rice and stir for a few minutes until the rice is coated in the oils and spices 

4. Add in the chicken stock and give it a good stir, then add in the tomato puree and a good pinch of salt and pepper and stir again. Leave to simmer on low for about 15 minutes, keeping an eye on it and adding a bit more water if required.

5. After 15 minutes add the peas and leave to simmer for another 5 minutes, until the rice is cooked and the chicken is tender.

6. Best served with a wedge of lemon to squeeze all over the top however, I have two young children and they think this is disgusting so feel free not to ;)

This dish is an straightforward one pot recipe that can easily be whipped up with a few store cupboard ingredients; I know not everybody has saffron but it does add a bit of special flavour to the dish and you only use a few strands each time so a little goes a long way.

So what is your favourite dish from around the world?

On the 22nd to 23rd July 2017, Eats from the Street is coming to Giltbrook Retail Park with a variety of street food flavours from across the globe. A fab pop-up foodie festival with artisan vendors serving up a whole host of cuisines from around the world. Including loaded American hot dogs and burgers, traditional Vietnamese dishes and Wilma’s Cupcakery selling their signature cupcakes and cake-topped milkshakes.

The street food stalls will be serving between 11am and 6pm and unlike other food festivals, visitors will be able to sit and eat their food on a converted double-decker Routemaster bus, which has been transformed into a dining area.

We'll be popping along to this fab event as we not only love to try new foods but with so many shops to choose from it'll be the perfect opportunity to do a spot of shopping too.

This is a collaborative post, all words are my own.

Monday, December 15, 2014

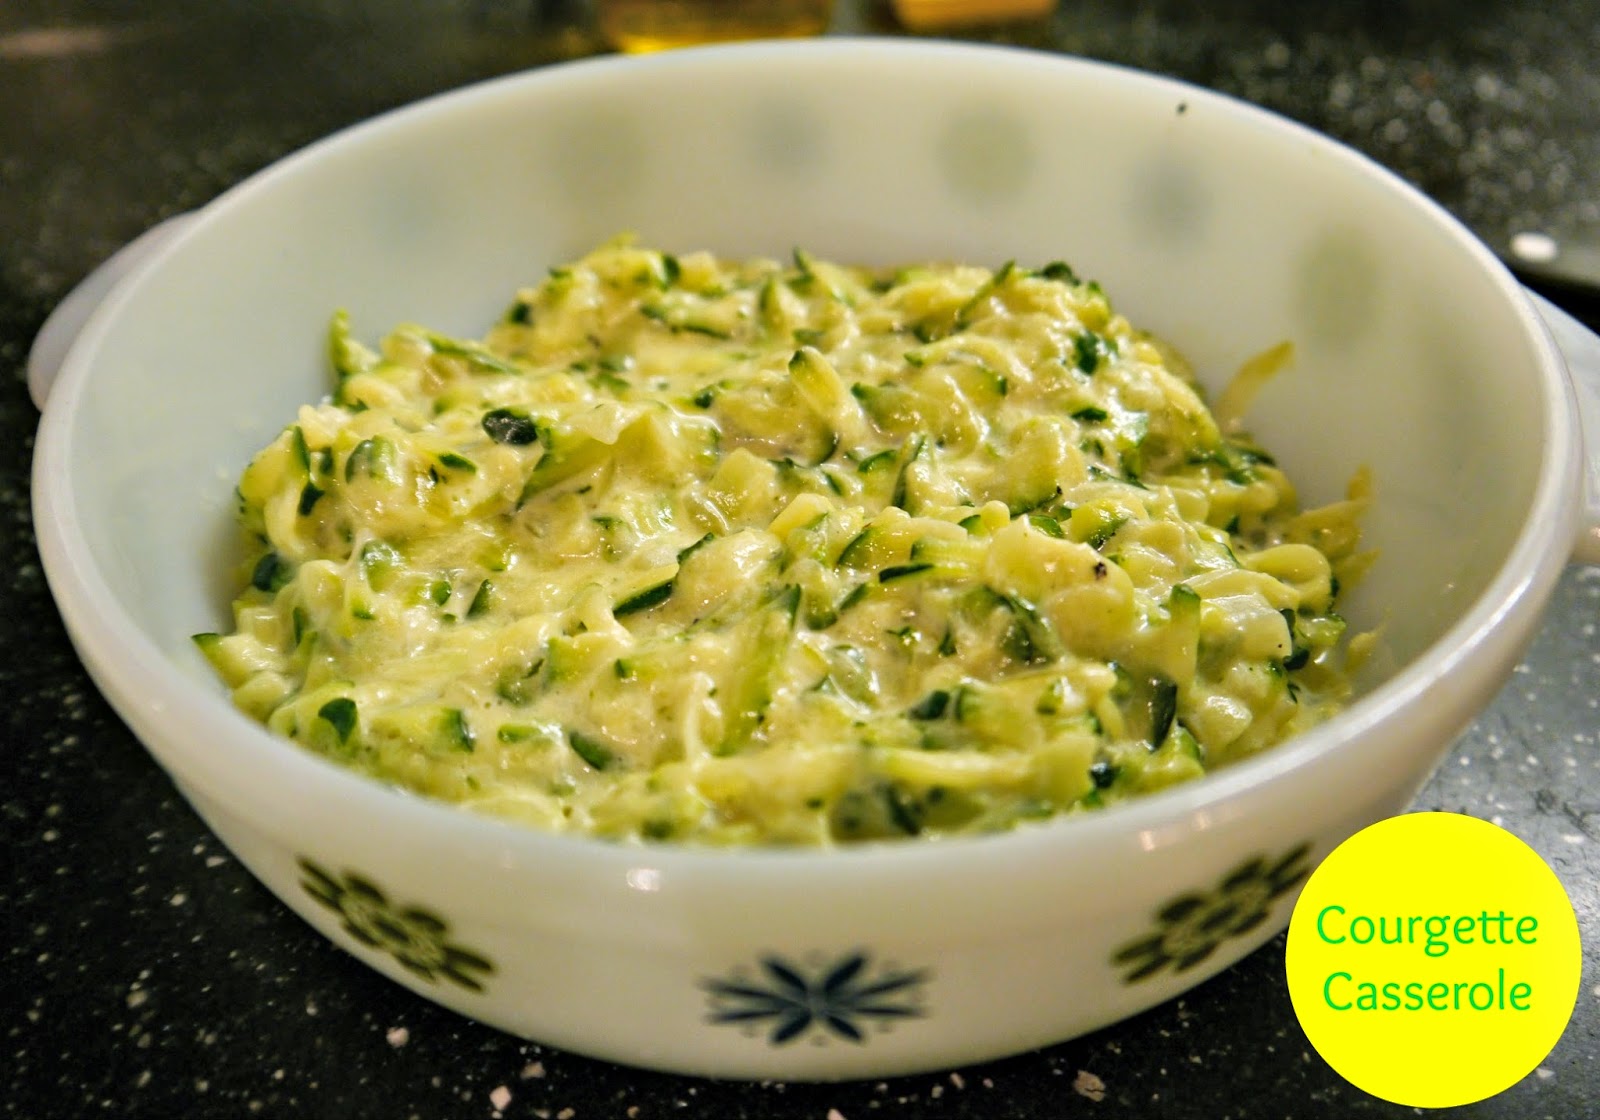
Courgette Bake Recipe

This is another recipe from my hubby's aunty, she made us this fabulous side dish at a pre-Christmas/Thanksgiving meal, thanks Kate for passing this on, hope you don't mind me sharing.

Ingredients:

3 Large or 5 Medium Courgette
2oz Unsalted Butter
2oz Gran Padano grated (or any hard cheese such as Parmesan, Peccorino)
1/4 Pint of Double Cream (for a healthier option you could use half fat sour cream or creme fraiche)
Salt & pepper to taste

Method:


1. Grate the courgette and toss with salt and put in a colander or sieve over a bowl.  Leave for about an hour for the water to run out.  Squeeze as much water out as possible by hand but keep the liquid in case it needs more during the cooking. 


2. Chop the onion finely. Heat the butter in a large frying pan or wide saucepan add the onion and fry until it turns soft but not brown.  

3. Add the grated courgette and keep stirring until it is heated through and beginning to soften.  


4. Add the cheese and stir until melted.  Then add the cream and add some of the courgette liquid back if it seems dry.  Season with salt and pepper and put into a medium oven (about 160c) for about 30 minutes.  Add more cheese to the top for the last 10 minutes if desired.  


We had half of this for tea tonight and then I have put half the batch into the freezer for Christmas day.

Saturday, December 13, 2014

Brigadeiro - Chocolate Truffle Recipe

This recipe isn't my own but one my hubby's aunty told me about a few weeks back, she has lived in America for many years and recently came back to live in the UK and it is a favourite over there.

It is a really simple recipe:

1 tin of sweetened condensed milk (larger size about 397ml)
3 tablespoons of cocoa
15 g butter
Spinkles
Oil to grease hands


Method:

1. Place the condensed milk, butter and cocoa powder into a saucepan and heat for approximately 10-15 minutes stirring all the time, the mixture should thicken after about 10 minutes and come away from the sides and start to form a ball.


2. Leave to cool until it is cool enough to handle, rub a little oil onto your hands and then take a teaspoon of the mixture and roll into a ball.

3. Once shaped like a ball roll in the desired topping, I chose chocolate and Christmas sprinkles but you could use coconut, cocoa powder, crushed biscuits anything you like. Place in some petit four cases and serve, or you could wrap in little boxes and give as gifts.


What is your favourite Christmas treat?

Monday, July 7, 2014

Peanut Butter and Choc Chip Cookie Bar

Now this recipe isn't mine but I needed to share it with you, i've baked it three times since Liana at My Sugarcoated Life posted the recipe last week and each time it has gone down a storm. Just ask Jaime at The Oliver's Madhouse.

If you like peanut butter, chocolate, cookies and cake this certainly hits every spot, it's moist, tasty and gives the best sugar fix known to man...well maybe thats a little OTT but its darn close.

Here is the cake in all it's glory and the recipe can be found here..


It is the perfect accompaniment to a cuppa and I have made it for my husband as his birthday treat to take to work.

Thursday, May 1, 2014

Naniamo Bars - Tried and Tested

I was recently approached by the people at Baking Mad to see if I’d be interested in trying one of their recipes in return for some baking goodies, not one to turn anything baking related away and loving a challenge I agreed.

I had a look through their massive collection of recipes, including cake recipes, traybakes, and sweets and chose something I had seen before but never tried.

The recipe sounded yummy and not too simple, meaning I could challenge my baking skills.

You can find the instructions over on the Baking Mad website but here is my take on the ingredients, as a few of my family don’t like walnuts, it still worked well though.

Ingredients:

For the Base
75g Unsalted Butter 
100g Dark chocolate 
75g Digestive biscuits finely crushed 
75g Dessicated Coconut 
75g Flaked Almonds

For the Filling
1 Egg yolk
1tbsp Whole Milk 
1tsp Custard powder 
100g Unsalted Butter
Vanilla extract a few drops (I use Nielsen-Massey) 
150g Icing sugar (I use Silver Spoon) 

For the Topping
125g Dark chocolate

There is a really useful Enter Bake Mode on the Baking Mad website, which allows you to view the instructions whilst displaying the ingredients needed for that step.

Melting the butter and whizzing up the digestive biscuits...

Making the base...
Making the filling...

Adding the top...

Naniamo Bars are a Canadian treat and well quite frankly a resounding success, we all enjoyed it and anyone who saw them wanted to know what the recipe was. The perfect treat to have with a nice cup of tea.


 NB: I was sent some baking goodies by Baking Mad, the rest of the ingredients were paid for by myself and I have received no other compensation for doing this..

Sunday, February 23, 2014

Chocolate Chip Madeleines

Madeleines are my favourite and whilst I am never going to get them tasting the same way as my favourite ones from France these are a lovely substitute to whip up as a Sunday morning treat.

Ingredients:

100g Plain Flour
1/2 teaspoon Baking Powder
75 g Caster Sugar
2 Eggs
1 teaspoon Vanilla Extract
90g Unsalted Butter (melted plus extra for buttering mould)
Icing Sugar to dust

Method:

1 Melt the butter either in a sauce pan or my preference in a microwaveable dish until melted (be careful not to heat to much or it will burn or worse splatter everywhere), leave to one side to cool.

2. Sift the flour and baking powder and set to one side.

3. Next either using an electric whisk or hand whisk, whisk the sugar and eggs together until thick and fluffy.

4. Gently fold in the flour mix and vanilla extract (you could also use orange water or almond extract if you'd prefer), keep folding until mixed.

5. Fold in the melted butter a bit at a time until well mixed and nice and shiny (if looks like it isn't mixing but it will just keep folding until smooth).


6. Cover the surface of the mixture with cling film and place in the fridge for at least 30 minutes.

Heat the oven to 200c or fan 180c.

7. I use a silicone madeleine mould which are easy to use,  using the remains of the melted butter in the dish or melt a little more butter and with a finger just coat each shell in the butter (if using metal tins they might need a dusting of flour too to stop them sticking) and then place a heaped tablespoon (if you are using a large mould) of mixture into each shell.

8. Then sprinkle on a few chocolate chips or if you only have chocolate just add a sprinkle of some chocolate you have blitzed or broken up (use a rolling pin and bag to smash into smallish pieces) onto the top and place in the oven for 10 minutes.


9. Once cooled slightly remove from the mould and then dust with the icing sugar and serve, we all really like them warm with hot chocolate or coffee but these are equally lovely cold.


Bon appetit x

Monday, February 17, 2014

Easy Peasy Treacle Sponge Pudding

I'm useless at steaming puddings and I have used the Be-Ro recipe book to try a microwave treacle pudding but it just goes dry and horrible, so this recipe is not only easy to make but tastes great.

First of all, you need to make a basic Victoria sponge to go on top of the golden syrup:

100g Self Raising Flour
100g Caster Sugar
100g Stork Margarine
2 Eggs

For this recipe I just bung it all in the food processor and blend until smooth and thoroughly mixed through.


Next in an oven proof dish add some golden syrup, for this square dish I used about 3 heaped tablespoons but make sure you have a good amount of golden syrup on the bottom of the dish.


Then add the Victoria sponge mixture onto the top of the golden syrup and spread gently until all of the golden syrup is covered.


Place in the oven (on 160c) for about 20-25 minutes, you can either check this is cooked with by pressing lightly on the cake and it should bounce back or you can use a skewer or cake tester to check it comes out clean.


What you have then is a gorgeous soft and moist sponge pudding, serve with cream or custard or whatever you prefer.


This all went in one sitting as everyone loves it so much, lots of hot warm oozing golden syrup is always a treat.


Next time jam maybe?

Wednesday, February 5, 2014

Fruit, Nut and Seed Bites

I am currently suffering with all sorts of health problems, the doctor has diagnosed me with possible fibromyalgia and I have reduced kidney function so things are breaking all over the place.

On a mission to get healthy and to stop snacking on rubbish I spotted these over on Instagram and decided to give them a go with whatever I had in the cupboard.

I don't have any measurements it is basically a whatever you have in the cupboard kinda recipe and chuck in as much as you like of each thing.

These have raisins, dried cranberries, coconut, flaked almonds, brazil nuts, cashew nuts and some mixed seeds, 1 tsp cocoa and 1tsp of honey, all blitzed together until it becomes a sticky mess.


They don't look that attractive and even less so in ball form but you could put them in a baking tray and cut up if you so desired. Once rolled pop in the fridge to firm up and voila, Nakd style bites of loveliness.


Not only are these a healthier snack but they do seem to fill me up for longer to stave off the cravings till lunch and tea, plus they are really quick and simple.

Friday, January 10, 2014

Choc Chip Cherry Crumble

My current go to pudding is a choc chip cherry crumble.

Invented as an emergency pudding this delicious and simple pudding is now a firm favourite.

Using either frozen or tinned cherries (frozen are better in my opinion) this is an easy store cupboard pudding.

Ingredients:
150g frozen cherries or a tin of cherries (drained)
100g self raising flour
50g sugar
20g dark chocolate
50g butter or stork margarine if you'd prefer
1 tbsp cherry brandy (optional)

Method:

Preheat oven to 160c

1. Place the cherries and cherry brandy (if using) in an oven proof dish.


2. Place flour, sugar and chocolate in a food processor and blitz together until the chocolate is well chopped add the butter/margerine and mix again until it resembles breadcrumbs. Alternatively if you don't have a mixer/blender then mix the butter and flour together with your fingers to make breadcrumbs and then add the sugar and chop the chocolate up and add that and stir until well mixed.


4. Place the crumble top on the cherries and spread evenly. Sprinkle a bit of sugar on top and place in the oven for about 20 mins or until golden brown on top.


5. Serve with cream or custard.

You don't have to include the cherry brandy, I personally think it adds a little zing and it isn't enough alcohol to really make it alcoholic.

This week I am linking up to Recipe of the Week over on A Mummy Too blog.


Link up your recipe of the week

Wednesday, November 6, 2013

Lemon and Chia Seed Loaf

Chia seed has fast become a nutritious addition to salads, breakfasts and smoothies and I see it being used all the time over on my Instagram feed..

So with that in mind and with the fact I had some lemons that needed using in the fruit bowl I decided to try replacing poppy seeds with chia seeds in this super easy and tasty Lemon and Chia Seed Loaf.


Ingredients:

2 lemons
225g Unsalted Butter, Softened or Stork Margerine
225g Caster Sugar
275g Self Raising Flour
2 Level Teaspoon Baking Powder
4 Eggs
4 Tablespoons Milk
25 g Chia Seeds you could use Poppy if you don't have Chia

For the topping:


Approx 3 tbsp Lemon Juice but possibly a little more.

225g Icing Sugar, Sieved

Method

1. Pre-heat the oven to 180C/160Fan/Gas 4. Grease and line a loaf tin mine is about 22cm x 11cm.
2. If you have one use a zester to remove the zest from one lemon and set aside to use as garnish. Finely grate the zest from the other lemon, if you only have a greater then just finely grate both lemons just set some aside to garnish with. 

3. Place all of the ingredients including the grated lemon zest into a mixer (alternatively place in a bowl and mix by hand with a wooden spoon or hand mixer) and blend until smooth,  use a spatula to get any bits from around the edge and mix again for a few seconds.

4. Bake in the oven for about 45-55 minutes or until the cake is cooked. You can usually tell this as it starts to come away from the sides of the tin and if you press in the middle it should spring back.  if you'd prefer you can use a cake tester or as I do to be 100% sure it is cooked through a skewer poked in the middle that comes out clean. Leave to cool in the tin, once cooled remove carefully from the tin and place on a serving plate.


5. For the icing, mix together the lemon juice a bit at a time to the sieved icing sugar, until it is a smooth spreadable consistency. Should coat the back of a spoon without running off too much. Spread out evenly over the cake sprinkle with reserved lemon zest and leave to set.


And voila a really tasty cake that both hubby and the kids love.

Monday, October 8, 2012

Banana and Chocolate Loaf - The Big Fair Bake

Wherever possible I try to buy and use Fairtrade, so when I saw the Big Fair Bake over on Tots100 I decided to blog one of my favourite recipes.

Fairtrade is about 'better prices, decent working conditions, local sustainability, and fair terms of trade for farmers and workers in the developing world' and you can help with this by purchasing Fairtrade products wherever possible. 

From sugar to bananas it is simple and doesn't usually cost you any more, but could mean the world to someone else!

This recipe is super tasty and the perfect way to use up those left over, very ripe bananas:

Ingredients:

125g Butter or Margarine
175g Soft Brown Sugar
2 eggs
300g Plain Flour
1 tsp Bicarb Soda
150mls Whole Milk
1 teaspoon Vanilla Extract
3 Ripe Fairtrade Bananas

100g Fairtrade Chocolate


Method:

1. Preheat the oven to 180C. Grease and line a 25 x 11cm loaf tin.

2. Cream the sugar and butter together with a handheld electric mixer.


3. Add the eggs one at a time, mixing after each addition.

 
4. Sift in half the flour and all of the bicarb, stir with the metal spoon. Add in the milk and the rest of the flour and mix well.


5. Fold in the mashed bananas, vanilla extract and the chocolate then pour into the loaf tin, it looks like a lot and fills the tin but will be ok.


6. Usually takes about 1 hour 15mins to 1 hour 30 minutes, but keep checking every 5 minutes after about 1 hour 15 mins.


7. Once cooked take the tin out of the oven and leave to rest for about 20 minutes, when slightly cooled remove from the tin and leave to cool completely. Alternatively you can cut up and serve warm with some butter or Nutella and a nice cup of tea.

Perfect for guests, I will be taking this one to my gran and grandad tomorrow.


You can see the other entries via twitter using hash tag #bakeitfair and more on the Big Fair Bake website.

Tuesday, September 18, 2012

Chocolate Orange Cupcakes

This week is national cupcake week so it seemed only right I made some.

Whilst stood in the kitchen thinking about what I could make I suddenly had a thought, Chocolate and Orange. A match made in heaven as far as both myself and Terry's are concerned!.

So I whipped up some of my basic sponge mix ( I don't like too much chocolate so just use a plain sponge) and then to the top added some chocolate orange buttercream.

To make the buttercream (for about 12 cupcakes):

200g Icing Sugar
80g Softened Unsalted Butter
1 tsp Orange Oil (You could use orange juice but I find this is more concentrated and the flavour is more subtle)
2-3 Tablespoons of Whole Milk (you probably won't need milk if using all orange juice but I do find milk makes it a little fluffier.(

Mix the icing sugar and butter together, add in the oil and then a a tablespoon at a time of the milk until it is a smooth and pipeable consistency.

To pipe I either do a full cake or part cupcake, it depends how much you like the icing and who is having it.

Here you can see a full iced cake with flowers


Or a part iced cake so some of the cake itself is exposed, less icing for those who don't like it or the kids.


Have you been baking this week, please do leave a comment if you have. I love finding new recipes or ideas.