MENU

Showing posts with label diy. Show all posts

Monday, March 7, 2016

Make Your Own Scrabble Art

I'm always trying to find unique ways to make the house look pretty and these scrabble art pictures are the perfect way to create wonderful pieces to hang in your home.

You can usually find old scrabble sets for a few pounds either at the charity shop or car boots, so do keep an eye out if you fancy a go at this.  For the background on this picture I used some sample pieces of wallpaper I'd picked up when we had been in the DIY store, you could use wrapping paper, a map, photo or any other type of paper or even fabric.

You'll also need some glue and a box frame, you can have a search around the charity shops for a frame or you can buy a new one, they are usually quite reasonably priced from places like Wilkos, B&M, Home Bargains or even one of the supermarkets.


First of all take the back from your frame and lay on the backside of your paper or fabric, draw around the edge and then carefully cut out the background, it is worth trying out your scrabble pieces on the paper or fabric to make sure it is easy to see, on busy backgrounds they might not be so obvious. Once you are happy then stick the paper or fabric to the back piece of the frame, I used Dovecraft glue from Wilkos, it is really strong and only about £1.


Once you have glued the paper/fabric to the back of the frame then you need to lay out your words, have a play with a few words you like and you'll eventually find something you love, obviously the words need to be able to connect, have as many or as few as you like. Names, special words or places are great to add. 

Once you are happy with the words you have chosen and the layout then carefully stick them down onto your chosen background, if you are using a large frame it might be worth using a ruler or spirit level to make sure the lines are straight.


Once you have finished, careful place the back into the frame and there you have it, a simple but effective picture, perfect to give as a gift or just for yourself. Now all you have to do is decide where you'd like to hang it and how many more you can make with the left over pieces.


The great thing about this project is, if you get bored of the background or fancy a change you can just take off the tiles and start again.

What would you put on yours?

Happy and Home at A Residence blog

Wednesday, November 19, 2014

DIY Fabric Garlands

I love to decorate the house and there is no better time to do this than at Christmas. These fabric garlands are a great way to add a splash of colour to your home, they won't break the bank as they can be made using old fabric scraps or even old clothes.


Firstly, choose your fabrics. I picked five fabrics and a red ribbon I had in the craft box. Cut the fabric into strips about 2cm wide and about 50cm long, you could use a few pieces of fabric and a few ribbons if you have them.


I chose to make mine look rustic so cut slightly up the fabric and then tore the rest of the way, this leaves a few strands of string hanging off.


Once you have cut all of your fabric into strips, you need to start building the garlands. To do this, stack one piece on top of another, mine have 11 pieces each, two strips of each fabric and one piece of ribbon. Once you are happy with how it looks, place the fabric pile with the rough side facing up and fold it over whatever string you are using. I am using brown string as it is a Christmas themed fabric selection.

Once you have folded it on itself, use either, another piece of brown string or, whatever you are using. I used some left over fabric and tied this around the garland, this part is made easier if you hang the string up, perhaps between two chairs, before adding the fabric.


Once you have done this with all of your fabric pieces, then you are ready to hang! You can make these as big or small as you like and you could have smaller garlands if you used thinner or shorter fabric pieces.


The garlands can be hung over your fireplace, on a wall or even on the window, they would also look great on the wall in a child's bedroom, you could make one using fabric to match their bedroom.

Wednesday, August 27, 2014

The Front Door Project

So after spending several days posing in front of the door at our holiday home and having serious door envy I have decided that it is time to do ours up.


Short of buying a new door, there is only really the option of painting and making it look pretty, although this won't change the fact that it is a very drafty door!

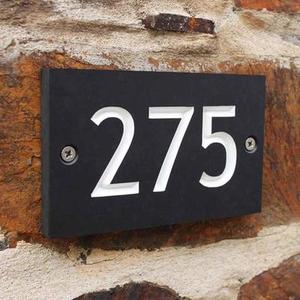
So here is what we are up against, the hideous door number, I have been wanting to change it for ages but just haven't gotten round to it.


To replace it I was thinking of something like this, simple and a lot better.


The door is a hideous brown with random holes from previous door furniture and years of wear.


I am loving this colour paint from Farrow & Ball, with some new door furniture I think it would just look stunning or better still a complete new door in a similar gorgeous green.


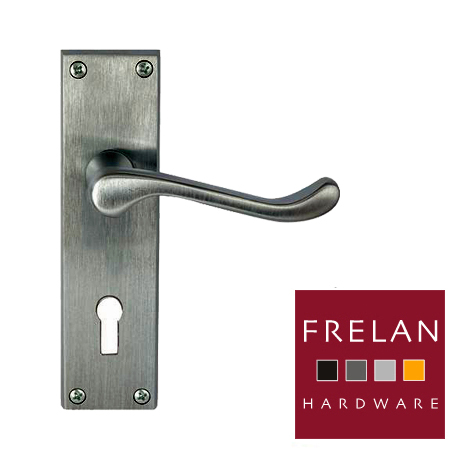
The door handle is an awful gold and again from years of keys being turned in it has seen better days.


I really like this satin chrome, I think against the lovely green of the paint it would look much better, they also do a letterbox to match.

And then finally the light, I feel ashamed by the amount of cobwebs that you can see here but it is just such a neglected part of the house and real shouldn't be as it's the one people see first.


So I have found this one, I adore it! It is simply beautiful and if I could replace every light in the house with one I think would.


So as this project gets on the way I will be sure to add more ideas and update with changes in colour, I have no idea where to start on painting the door but I will give it a go!

Follow The Mummy Diary's board New Front Door on Pinterest. 

Monday, August 4, 2014

Make Your Own Baby Birth Stats Wall Art

This week whilst I am on holiday I am passing over the blog to a few lovely bloggers, first up is Emma from Handbags To Change Bags, her blog is beautiful and a great insight into her life and her beautiful family. Anyway enough babble from me, over to Emma.

Hi I'm Emma from Handbags To Change Bags and I'm guest posting for the lovely Ellie today while she is away on holiday. Today's post is a DIY, hope you enjoy it!

I'm always on the lookout for cute ideas for my kids bedrooms and the home in general, I recently saw a lovely personalised piece of wall art with your baby's birth stats on it and thought it would be perfect for Summer's bedroom.

However when I noticed the price was £28 without a frame and when you add in the frame it was £68 I just couldn't justify paying that amount.

So I decided I'd take on a little DIY project and have a go at making one myself and I'm really pleased with how it came out!


All I did was use PicMonkey to add different texts in different colours and fonts to a white background and printed it out. I chose to design mine a little different to the one I'd seen but you can design it anyway you want.


I got the frame from Ikea and the whole thing cost me the grand total of £4!


I think it looks lovely in Summer's bedroom and goes perfectly with her room decor, I'm going to make another one for Riley's bedroom and I'm also making one for my nephew as part of his birthday present.

Thank you so much Ellie for allowing me to guest post and if you enjoyed my post then please pop over to my blog and say Hi!

XXX

Wednesday, March 7, 2012

Fab crafty finds - bunting!

When I was looking for ideas for bunting for my daughters birthday (we had a huge empty room I needed to fill) I found a couple of great ideas.

The first one which I already knew about and had tried was this brilliant no sew bunting, at the time I didn't have a sewing machine and couldn't sew so this was perfect for me.

The results are brilliant and everyone I showed it to was impressed, I bought the material in a fat quarter bundle from Hobbycraft ages ago and it was just the perfect amount for the job at hand.


You can find the tutorial over on Red Ted Art's blog, if I can do it then anyone can ;)

The next was printable bunting, I found a couple of great sites which have printable bunting.

The first is Ruffled Blog, the prints are gorgeous and if I end up having a 30th Birthday party I will be printing some more of these out.


And then this gorgeous bunting and cake toppers from Creature Comforts Blog, they really are beautiful and perfect for a little boys bedroom or summer party in the garden.


Best of all these are recyclable both in terms of using again and being just paper you can always pop them in the recycling bin when you've finished with them.

There are lots of others so do have a little google to see if there is something you like for a birthday or celebration this year, it has also given me ideas on how to make my own for my sons 4th birthday this year.

He wants an octonauts themed birthday and I have an idea for printing some out to make so watch this space :)